This guide will show you 3 ways to create a product
Your product can be anything you want to offer your customer, whether it's a course or other digital product like a downloadable resource, software, info sheet, graphics template, etc. A product can be used as the main product in an offer, as a bonus for an offer, or even as part of a bundle. It can also be used as a bump or an upsell.
📑 Notes:
- In one offer you might use the product as the main product, while in another, it can be used as an upsell. Alternatively, in yet another offer, you might even use it solely as the bump offer.
- Products are interchangeable, so you don’t need to create multiple products for different offers.
Jump to:
There are 3 ways to create a product in Voma:
Option 1: Create a new product from the Products Dashboard
Option 2: Create a new product on the fly while creating an offer
Option 3: Import an existing product from Stripe
Option 1: Create a new product from the Products Dashboard
-
Head to the Products tab on your side menu and click New Product, Create a New Product.
-
Complete the product details.
-
Name - Internal product name for your product
-
Title - The product name your customers will see
-
Type - Choose Product. (Alternatively, see how to create a bundle)
-
Description - A description of your product for internal use
-
Tax Category - this field will only show when tax is enabled in Stripe
- Thumbnail - Upload a product image (recommended dimensions are 750x750).
-
-
Click Save.
📑 Note: If you create your product in Voma, your product will automatically be created in Stripe.
Option 2: Create a new product on the fly while creating an offer
While creating an offer under the Offers tab, you also have the option to add a product while on the fly if the product doesn’t already exist in Voma.
- Click on
Or create a new product
- Complete the product details.
- Name - Internal product name for your product
- Title - The product name your customers will see
- Type - Choose whether this is a product or bundle
- Description - A description of your product for internal use
- Tax Category - this field will only show when tax is enabled in Stripe
- Thumbnail - Upload a product image (recommended dimensions are 750x750).
-
Click Save.
Option 3: Import an existing product from Stripe
-
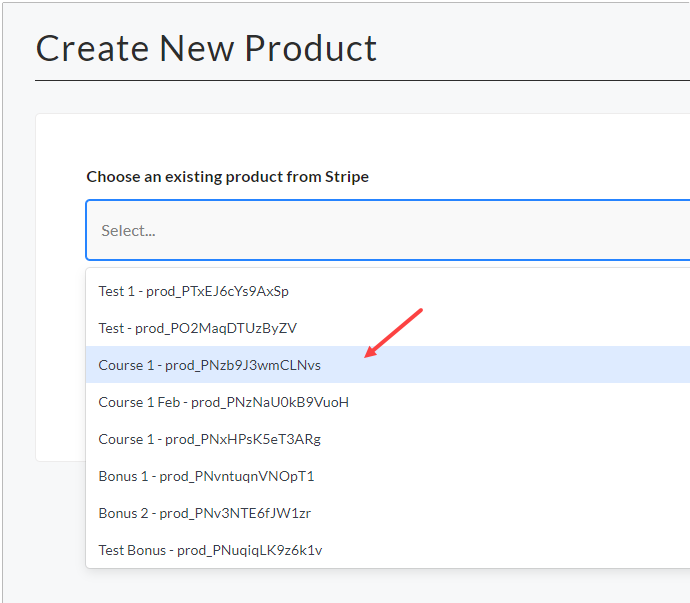
Head to the Products tab on your side menu, click New Product, Choose an existing product from Stripe.
- Select your product from the drop-down list.
- Review the imported product details and make changes if necessary, then click Save.
- Name - Internal product name for your product
- Title - The product name your customers will see
- Type - Choose whether this is a product or bundle
- Description - A description of your product for internal use
- Tax Category - this field will only show when tax is enabled in Stripe
- Thumbnail - Upload a product image (recommended dimensions are 750x750).
📑 Note: If you edit these fields, your product will also be edited and updated in Stripe.
🔎 Sneak Peek
🔗 Head over to Setting the default price of a product or bundle for more details about choosing the default price and payment option that is first used when you add a product to a new offer.
❔ If you have any questions, please let us know at help@voma.ai or in our live chat at the bottom right of your screen.